By Steve Morgenstern for Techlicious
Gmail is certainly one of the most appealing freebies on the Internet – a no-cost web-based email account with over 7 gigabytes of online storage. New users grasp the basics of sending and receiving mail in the time it takes to look over the on-screen display, scan the inbox and locate the "Compose mail" button on the lefthand side. Invest a few minutes learning about some of Gmail’s advanced features, though, and you’ll go a long way to taming the overwhelming email assault most of us face every day. Here are ten of my favorite Gmail power tools and timesavers.
1. Labels and Stars
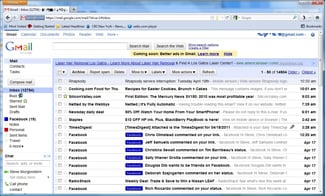
For at-a-glance highlighting of important messages, click the little star icons immediately to the left of an incoming message and a gold star will appear. To see only the messages with a star, click "Starred" in the leftmost column.
For finer sorting options, Gmail has a sophisticated labelling system. There are a few preset labels (including Notes, Personal and Travel), but you can easily create as many as you like (and eliminate the defaults if you prefer). You can also assign colors to the label names, which makes them easy to spot in the inbox display.
Click on the name of a label in the left column and only messages that fit the category are displayed. A message can have several labels applied at the same time, which makes this sorting capability very flexible. And you can use Gmail’s filter capabilities (described next) to automatically star or label messages as they arrive, which is more powerful still.
2. Create Filters
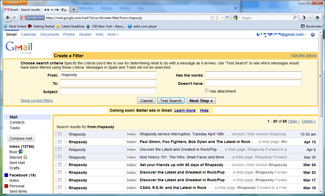
Gmail lets you create filters based on words that appear in the sender or recipient name, the message subject, and the body of the text (you can look for messages that have a particular word, or messages that don’t). The system can then perform many different actions on that message, including archiving it, marking it as read, applying a label or star, forwarding it, deleting it without reading, or protecting it from the spam filter. For example, I have all my incoming Facebook activity notifications labeled automatically, so I can spot them, read them and delete them easily. For persistent spammers, I simply enter their email address and Gmail auto-trashes anything they send. The step-by-step process is easy to follow: click the Create a filter link to the right of the search bar.
3. Conversation View
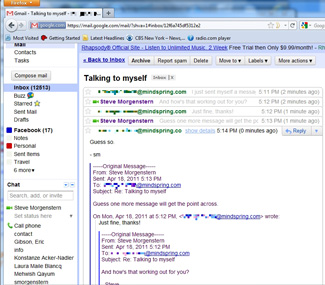
By default, Gmail displays all back-and-forth replies along with the original message, with their subject lines stacked to create what they call a conversation view. It can be an efficient way to see related emails all in one place, or it can make for a confusing on-screen display. If you’re not a fan, simply turn it off under Settings, in the General tab.
Article Continued Here
This post is excerpted with permission from Techlicious.
PC Pitstop is proud to welcome our friends at Techlicious as guest contributors. Founded by consumer tech guru, Suzanne Kantra, Techlicious is your daily scoop on everything from the best new mobile phones and apps to holiday shopping guides to step-by-step instructions for protecting your privacy on the Internet.

