Note from PC Pitstop: We recently asked our TechTalk contributors to recommend a favorite FREE application or tool that they currently use. This post is the response from Tips4PC.com
by Mitz Pantic from Tips4pc.com
Amazing Free Photo Editing Tool
Windows Live Photo Gallery – 4 Free Amazing Features
Windows Live Photo Gallery is an amazing piece of software and it is totally free to all Windows users. There are so many cool features included with this software and to mention them all would require more than just one article. Therefore I have chosen only 4 favourite features that are included with this fantastic software!
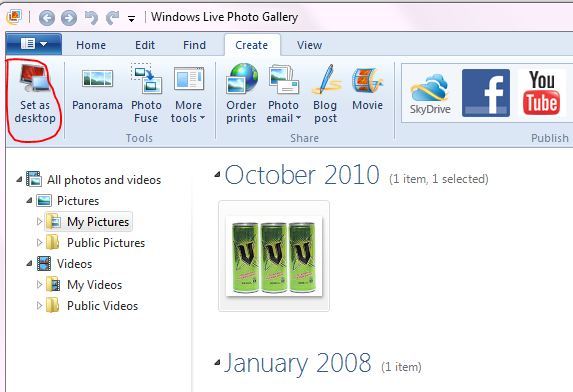
#1. Change Your Desktop background
I thought we would start with the most obvious and probably the easiest tool of all, adding a picture to your desktop. Of course you can do this in the Windows operating system itself, but this is a handy tool to use when you are browsing through your Windows Live Photo Gallery collection.
All you have to do is press on the Create tab, then click on a picture once. This will select the picture. Then Click on the Set as desktop icon in the top menu bar. That’s it. Now you have a new desktop picture.
#2. Resizing Images
Don’t you just hate it when you go to upload a photo to a website profile and there is a problem because your image is either too big or too small? Yes we all know about this problem.
In Windows Live Photo gallery it is very easy to resize a photo to any size you need.
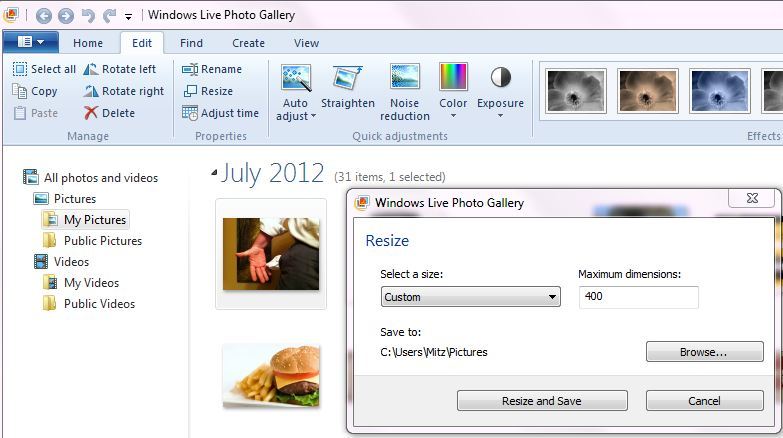
1.Open Windows Live photo Gallery. Select the picture you want to resize.
2. Click on the Edit tab in the top menu.
3. From the options presented below the tab, click on Resize.
4. A Resize dialog box will appear.
5. Simply fill in the width you would like your picture to be.
6. Press on Browse to choose where to save your new photo.
7. Press on resize and save when you are ready to resize the photo.
Do not worry if you make a mistake because your original photo will still be in its original location.
Tip: It is good to see what the original size of the photo is first so you have an idea what to resize to. Simply right click on the photo and choose properties from the menu. There you will see the photo dimensions.

#3. Send a Photo Email
This is a pretty cool feature that is often over looked in Windows Live Photo Gallery. Everyone knows you can send photos to friends through emails but what about slides shows and large groups of photos?
Please note: For this feature to work you will be prompted to sign into your Windows live account.
That’s not the only cool thing about sending photos through Windows Live because the actual photos are stored on SkyDrive (Microsoft’s online storage) for free for at least 2 months. Therefore the person receiving this email can either view the slide show of this photo collection online or download them onto their own computer.
How to Send a Photo email
1. Select your photo you want to send. To select more than one photo, hold the CTRL key down on your keyboard while selecting photos with your mouse pointer. You can also add more photos from the email later.
2. Make sure you are on the home tab in windows Live Photo Gallery; you will see an icon on the right side of the menu that says Photo email. See the screenshot below.
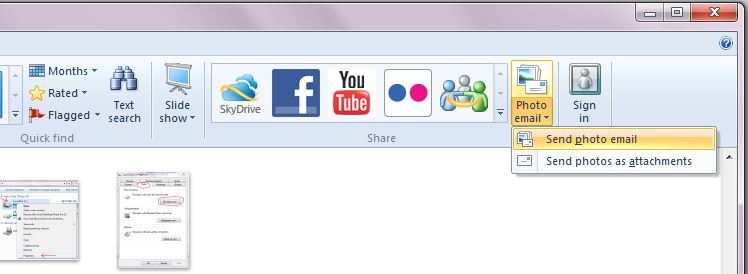
3.Your Windows Live email will open with your photos ready to go.
4.You can now add more photos by clicking on the add more photos box.
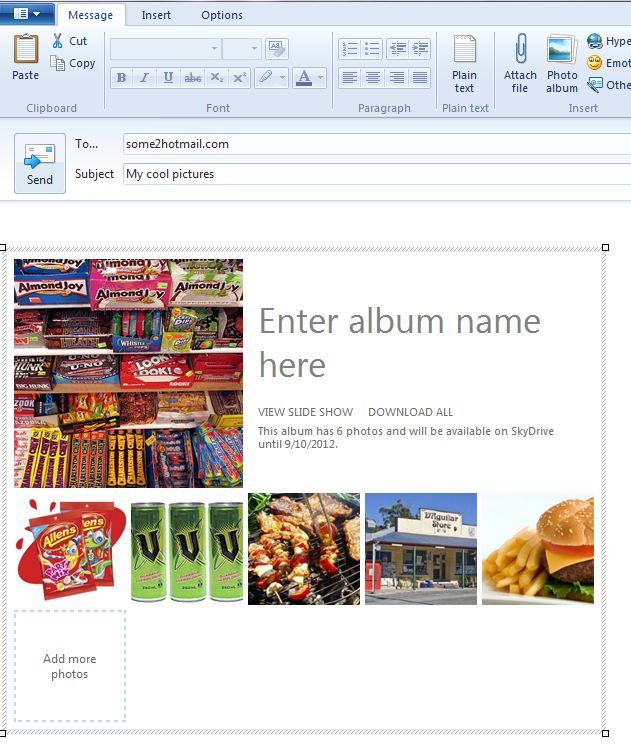
How cool is this. When your email recipient receives this email they will be able to see the slideshow or download the photos.
The email does not take ages to download either, as the photos are stored on Skydrive.
#4. Make a Movie from Your Photos
Ok right now you are probably wondering why you would want to make a movie when you could just send a slideshow to someone? Well a movie can be uploaded to YouTube and shared in a different way. It can be used for advertising or promotion. You can add a voice over to the movie, special effects, and more.
Windows Live Photo Gallery makes it easy to create a movie from your photos and it is amazing how fast this can be achieved.
1.Simply go to the create tab.
2.Select a few photos now. Remember to hold the CTRL key down to sect more than one. You can see in the screenshot below, I have selected 4 photos as they have a grey box surrounding them.
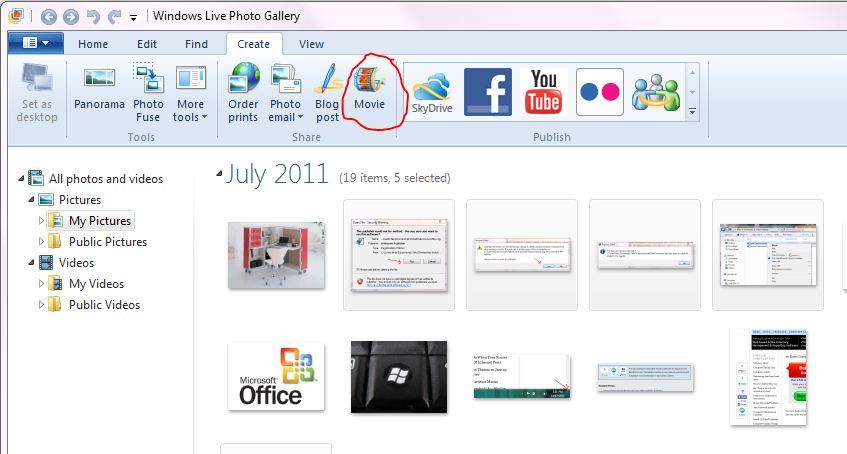
3.Press on the Movie icon.
4.Windows Live Movie maker will open with the photos all lined up.
5.You can now edit the movie, add a voice over, add animations, and more.
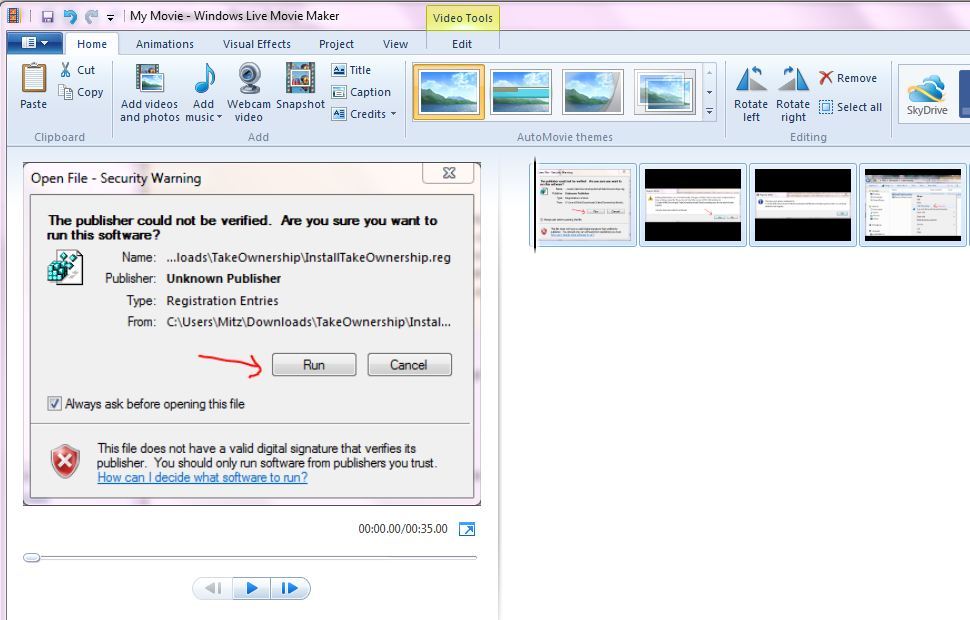
Windows Live photo Gallery comes with some absolutely amazing features and it is all for free. This is just the tip of the iceberg because I have not even mentioned Photo Fuse, Photo Editing, Photo Retouching, and many more. The only solution is for you to grab Windows Live Photo Gallery for yourself to see what it can do.


