By Ellen Finkelstein
Animation techniques for stunning PowerPoint slides
Presenters who use Microsoft PowerPoint 2002 or later have access to several rich animation features – features that, if used intelligently, can add tremendous impact to run-of-the-mill slides. Indeed, with the addition of motion paths, new trigger effects and the ability to add two animation behaviors to one object, PowerPoint has become capable of creating sophisticated animations that rival complex animation software. The following tutorial will show you how to combine motion paths with other animation effects to create vibrant, compelling slides.
Motion paths and more
Most people know about motion-path animation, the feature – available since PowerPoint 2002 – that enables movement of an object along a standard path or one of your own choosing. When motion-path animations are combined with other animation options, such as scaling or rotating, the results can be both wonderful and useful.
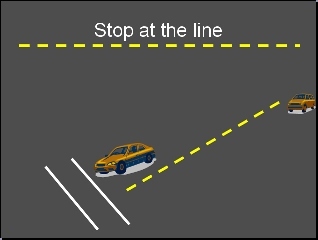
To illustrate the technique of combining motion paths with other effects, we’ll create an example slide from a driving-class presentation. We want the car that looks farthest away to travel toward the audience and stop at the first of two parallel lines. To accomplish this, the object must do two things simultaneously: become larger and move along a path until it stops near the static car in the foreground.

motion-path animation (before the effect)
To begin, you need clip art of two vehicles that are close to the same size so they will appear so once the animated car comes to a stop. Then make the one of the car images smaller. Click to select the car, then right-click and choose Format Picture. Once in the Format Picture dialog box, click on the Size tab. This window provides the tools to scale the image by percentage. For my example, I shrunk the car down to 50 percent, making it smaller by half. I then moved the car to the upper-right of the slide.
This post is excerpted with the permission of PowerPoint Tips.


