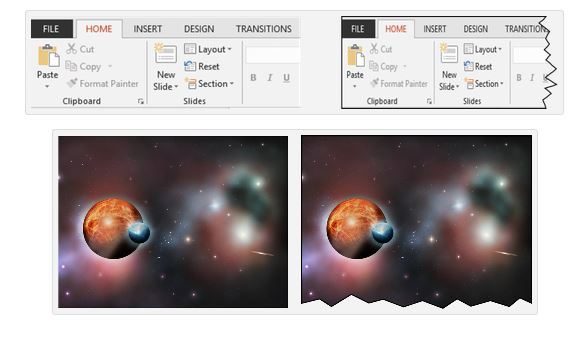
Learn how to create a ‘torn edge’ effect in a PowerPoint presentation. –PC Pitstop
Create Torn Edge Effect in PowerPoint
By Ellen Finkelstein
Sometimes you need to show part of an image. This is especially common when you’re showing a screenshot of a document or form. I can think of 2 reasons for this:
The image is too big to show clearly on the slide
You want to focus the attention of the audience on a small portion of the image
When you do this, it’s helpful to provide a cue that you’re showing only a portion of the image and one way to do so is to show the cut-off side as a torn edge.
I’ve shown this effect many times in webinars and participants asked how I did it. The truth is that when the image is a screenshot, I create the effect in Techsmith’s SnagIt. (I love SnagIt.)
But it’s possible to create this look in PowerPoint using the Edit Points feature. First, here are a couple of examples.
The original is on the left and the torn edge version is on the right.

This post is excerpted with the permission of PowerPoint Tips.


