by Jim Hillier for Daves Computer Tips
One of the most important yet often neglected aspects of this process is the preparation. Before you even open Windows Live Movie Maker make sure all the photos you wish to use are contained in the one folder. If the photos are scattered about in different folders; create a new folder and give it a suitable title, then transfer all your required photos to that one folder. Now, sort the photos into the correct order of display and then rename them sequentially: select (highlight) all the photos, right click on the first photo and select Rename. Give the photo a suitable title followed by the number 01 in parenthesis…e.g. for my sample slideshow I renamed the first photo “Beautiful Tasmania (01)”. Then hit “Enter” and you will see that the photos now share a common name and are all numbered sequentially. We are ready to begin:
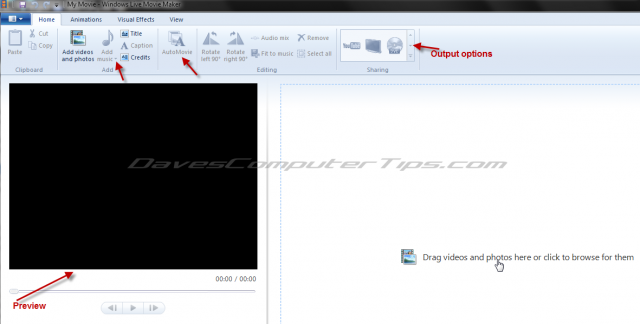
Windows Live Movie Maker’s GUI has adopted the modern Ribbon style menu which on first viewing appears somewhat confusing, at least to the uninitiated. I can assure you though, once you get used to it, it is very simple and easy to use:

Whether you choose to drag and drop the photos or import them via the browse feature; don’t forget to select (highlight) all the photos in the folder.
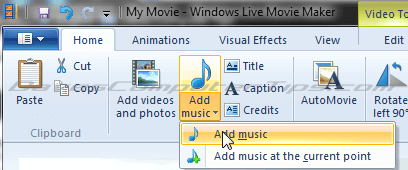
Once your photos are displayed in the main pane you can now add a music track. Simply click on the Add music button, navigate to the location of the required MP3 file and select the one you want:

Article continued here
This excerpt is shared with permission from davescomputertips.com.


