When I was first preparing for this topic, I had never checked my computer’s camera privacy settings. I thought I knew which apps had access to my camera, and which did not. Wow, was I mistaken. It is strongly advised you follow the steps below to check your privacy settings for your camera, as well as disable any camera rights to apps you may feel don’t need camera access.
Accessing and Editing Computer’s Camera Privacy
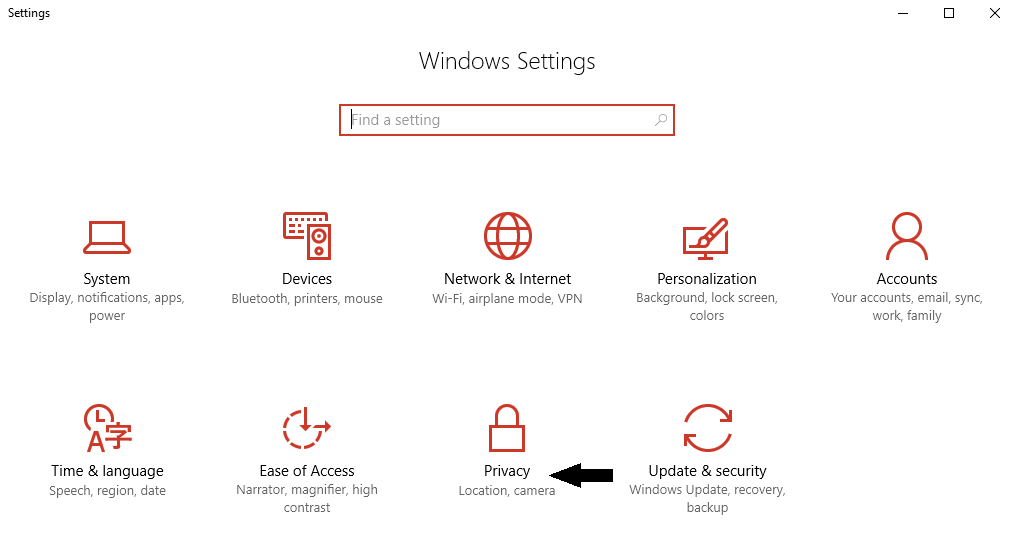
First, you need to go into you “Settings”. You may do so by clicking on the Start menu, and then scrolling down to “Settings”. This will open the window below.

From here, click on the “Privacy” option. This will populate this screen:

From here, you will want to click on the “Camera” option on the right side of the screen. Then the camera privacy settings will show, as seen below:

You can enable or disable the camera option by sliding the dot to “On” or “Off”. Also, be sure to scroll down to review all programs that have been granted rights to your PC’s camera.
As stated above, each PC user is strongly advised to go into these settings to be sure they are aware of what applications/apps are being authorized for camera use. Every single one of the programs above had access rights to my camera. I am not entirely sure what OneNote would need my camera for, but I found it disturbing that so many of these programs had camera rights without my recollection of allowing such.
Be safe. Check out your privacy settings, and edit accordingly.
I hope this “how-to” helped, and as always if you have a topic you’d like covered, please comment below!


